https://www.xperience-group.com/news-item/microsoft-teams-sync-device-buttons-setting-guide/
A fantastic new feature in Microsoft Teams is the “Sync Device Buttons” setting in the Teams desktop client. This seemingly small setting can have a big impact on how you manage your devices and interact within Teams.
The Sync Device Buttons setting in Microsoft Teams desktop client enables you to control how your connected audio and video devices, such as headsets, microphones, and cameras, interact with the Teams application.
By configuring this setting, you can ensure that your chosen devices are used consistently across all Teams meetings and calls, providing a seamless and hassle-free communication experience.
Configuring the Sync Device Buttons setting is a breeze. Here’s how you do it:
1. Open the Microsoft Teams desktop client.
2. Click on your profile picture in the top-right corner, then click on Manage Account.
3. From the menu of the left-hand side, select Devices.
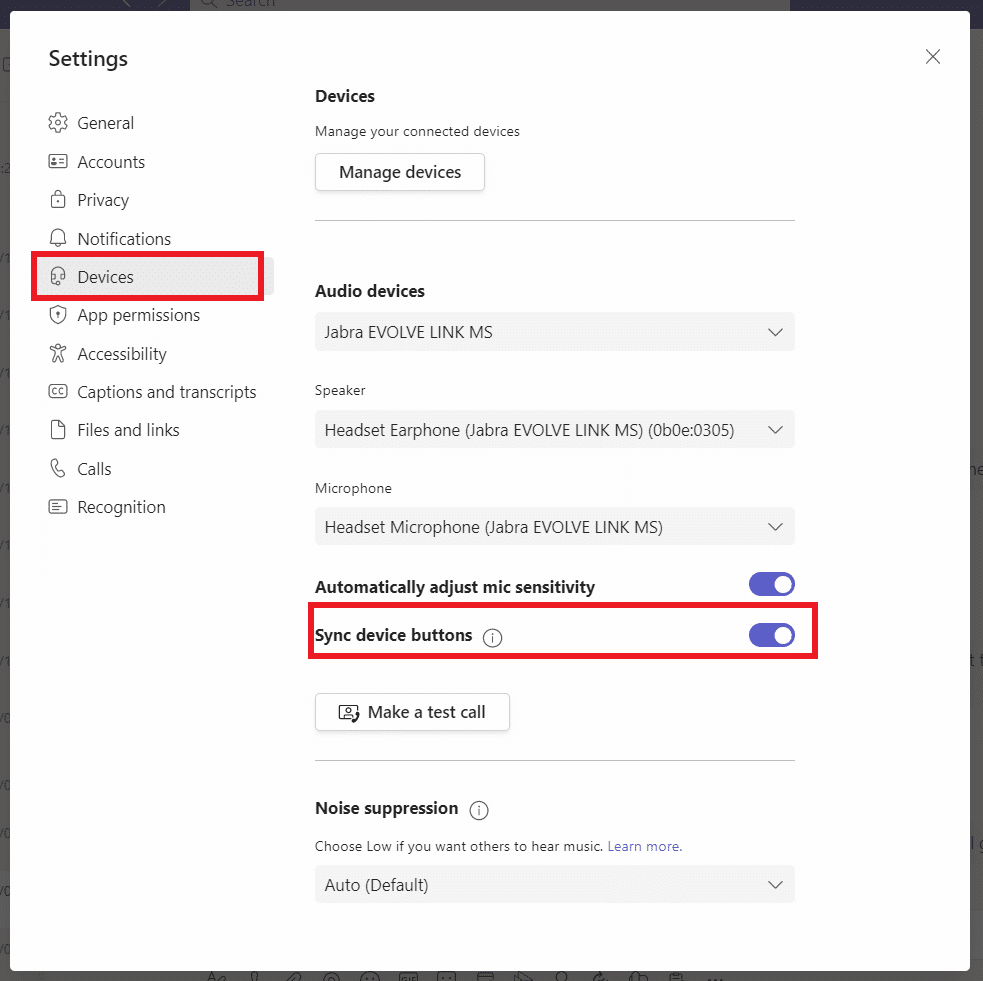
4. In the Devices section, you’ll find the Sync Device Buttons option, which you can toggle to on.
5. In this area, you can also choose between the “Default” and “Custom” settings, based on your preferences.
6. You can alter all the other device settings such as:
And different camera options such as:
Personalising Your Communication Experience: Teams’ Sync Device Buttons setting allows you to choose between two distinct options: “Default” and “Custom.” Understanding the implications of each choice can help you tailor your communication experience to your preferences.
Let’s explore the default and custom settings in more detail…
1. Default Setting:
By selecting the “Default” option, Teams will automatically switch to the most recently used audio and video devices for each meeting or call. While this might be convenient for some users who frequently switch devices, it may not suit those who prefer consistency and want to use specific devices for specific scenarios.
2. Custom Setting:
Opting for the “Custom” setting gives you more control over your device preferences. You can manually select the preferred audio output, microphone input, and camera for your Teams meetings. This is particularly useful if you have a dedicated headset, high-quality microphone, or professional camera that you’d like to use consistently. By choosing this setting, you ensure that Teams always uses your preferred devices, regardless of the last-used configuration.